Nettle pesto fresh from the garden and Crunchy Pesto-topped Salmon with Wholewheat Pesto Spaghetti and Wilted Chard


Nettles keep popping up in-between the chard and radishes in our raised bed, so I thought I’d put them to good use. I know it’s easy to make nettle soup, but I was in the mood for something a bit gutsier, so I made nettle pesto.

Nettles are extremely nutritious and particularly rich in vitamin C, iron, calcium, magnesium and nitrogen. They taste a bit like spinach and give a deeper, earthier flavour than traditional basil pesto.

You need to blanch nettles before eating to eliminate the stinging chemicals. The usual advice is to use the tips of fresh spring nettles, before they become tough and flower, at which point they can do serious damage to your urinary tract, so stay away. Nettles are also really important for wildlife, especially butterflies as caterpillars feed on them, and ladybirds, which lay their eggs on them, so it’s good to leave a few nettles alone if they’re doing no harm in a corner of the garden or on your allotment.


 I picked summer nettles, but they were still young, so perfectly good for eating, and I don’t really want a raised bed full of nettle plants. One thing’s for sure – you need to wear thick gardening gloves or a good pair of marigolds to do the picking.

I like the aromatic kick of basil with white spaghetti, but I think nettle pesto goes really well with wholewheat pasta and stands up better to the stronger flavours of meat and fish. I used mine as a simple spaghetti sauce and also to top some beautiful, oily salmon. Delicious.

For the nettle pesto
50g young nettles
50g Parmesan
10 tbsp extra-virgin olive oil
50g ground almonds
4 garlic cloves
juice of 1 lemon
salt and pepper

For the salmon
4 salmon fillets (I buy MSC-certified)
4 tbsp stale breadcrumbs (I use up old wholemeal sourdough)
salt and pepper

wholewheat spaghetti, to serve (about 75g per adult serving), plus a few pitted black olives
chard, to serve

Preheat the oven to 200°C/180°C fan/gas 6.

Bring a large pan of water to a rolling boil and cook your pasta according to the instructions on the packet.

Bring a small pan of water to the boil and blanch your nettles for 1 minute. Make sure you wear your gloves when you put them in the pan. Have a bowl of iced water ready and when your minute’s up, plunge the nettles into the cold water to stop them cooking. Try to hold on to some of your cooking water. Drain the nettles thoroughly. You might need to squeeze out the excess water, but you can do this with your fingers now as they won’t sting.

Tip your chard into the boiling water you’ve saved from the nettles, put the lid on and steam until wilted and soft.

To make the pesto simply whizz up the cooked nettles with all the other ingredients in a food-processor and season to taste.

To make the crunchy salmon, top each fillet with 1 tbsp of pesto, 1 tbsp breadcrumbs, and season. Bake for 10–12 minutes until just cooked through. I didn't salt Sidney’s fillet and I left it in the oven for a few minutes longer, just to be on the safe side.

Stir the rest of the pesto through the cooked spaghetti with a few chopped black olives. Serve all the elements separately, or do it the proper way and flake the fish, chop the chard and mix it all up together, which is actually what I did for Sidney.


DIY height ruler


I’ve been meaning to measure Sidney’s height ever since he first stood up, which was many months ago now, but I never got round to it. I have fond memories of my parents measuring me against the wall when I was little – always hoping to be that little bit taller than I ever was, and desperately trying to catch up with my older sister.

However, this week Sidney turned 18 months old and I decided it was a good enough milestone for his first measurements. There's nothing like a deadline to make me get things done!

I’ve seen lots of DIY height rulers online and figured it wouldn’t be too difficult to make my own. I found a piece of wood in the street a while ago while we were scavenging for various home projects. It was a good height at just over 5 feet tall, had nice curved edges and it wasn’t too clean and new.


First we smoothed it down with sandpaper to get rid of any nasty edges and then it needed staining. I wanted it to be a similar colour to the old wooden rulers we used at school. It seemed a shame to buy a stain for such a small job, and I’d rather use natural ingredients when I make things for Sidney, so I decided to use turmeric.

I put a teaspoon of spice into half a jam jar of water and then added half a teaspoon of coffee to take the edge of the vibrant yellow. I gave the wood three coats and it came up perfectly. Without the coffee it might have turned out too yellow, but with the coffee it was just right.


I left it to dry and then added the markings. I used a small ruler and pencil to mark the centimetres along one edge and the inches along the other side. I made three guide marks – one along the top edge of the wood, one along the side edge, and one further towards the centre of the plank at every 10cm and foot. Then I joined the dots with a Sharpie, making the lines for the feet and 10-cm points a little wider than the rest, and added the numbers freehand.

I’m really pleased with how it worked out. If you wanted to do something similar, but you’re up for more of a challenge, there are instructions online for burning the measurements into the wood, which must look great when you get it right.


By the way, Sidney is a perfect 79cm/2’7”. But not for long, I’m sure.


Ruby's Lemon and Basil Tart


We were invited to a friend’s barbecue on one of the hottest days of the year. The hosts needed a dessert so I searched through my cookbooks for something suitably summery. I settled on Ruby Tandoh’s Lemon and Basil Tart, from her cookbook Crumb.


If you don’t have Tandoh’s book and you’re interested in baking, I recommend it. She started out on the Great British Bake Off, but was quickly snapped up by the Guardian to write a column for their Saturday Cook supplement. She competed on Bake Off while studying for her degree in philosophy and art history, for which she received a first. The lady is obviously smart and she brings all her intelligence to what is essentially a baking bible covering cakes, bread, sweet dough, biscuits, puddings, desserts, pies, tarts and pastries, with thorough advice on everything from perfect whisking to all the different bread flours. It’s thoughtful, considered, beautifully designed and very pretty.

So, I set aside the morning to bake the tart. It might not have been the best day to attempt shortcrust pastry, and it took a lot longer than expected – I ended up using the freezer to chill the pastry as the fridge just wasn’t cutting it – but I got there in the end and the result was a refreshing, gooey lemon tart with a hint of basil and a rich, crumbly pastry.


And I’m glad I made the effort. One of the barbecue hosts is a budding chef with a dream to open a deli, and she was assisted by a former chef at Heston Blumenthal’s pub, The Crown at Bray (the jerk chicken he prepared was the best I’ve tasted – and I live in Brixton). So my (Ruby’s) tart had some big acts to follow, but everyone loved it. It was the perfect dessert for a hot summer’s day.

Here’s how I made it.

Serves 8 (it’s pretty rich so mine probably served twice that many)

For the pastry:
175g plain flour
90g butter, firm but not cold (I only had salted in the fridge, if you use unsalted add a pinch of salt)
1 tbsp caster sugar
1 large egg yolk
1 tbsp milk

For the filling:
200ml double cream
a few basil leaves
4 large eggs
125g caster sugar
zest and juice of 5 small lemons (125ml juice)

First rub together the flour and butter until you have fine breadcrumbs, then add the sugar (and salt, if using).


Beat the egg yolk with the milk and slowly add it to the flour mixture. Bring the dough together (I needed an extra teaspoon of milk, probably because it was such a hot day), flatten it into a disc and wrap it in cling film. Refrigerate for 30 minutes (I needed to put mine in the freezer for 15 minutes afterwards).


Put the cream and basil leaves into a pan over a medium heat and bring to
a boil, then immediately take it off the heat and leave it to infuse.

Roll out the chilled pastry and line a tart dish, with a small overhang. Trim it back and press the pastry up the flutes of the dish so that it’s slightly higher than the rim (this allows for any shrinkage while it’s baking). My pastry was pretty crumbly so I patched up a couple of thin spots with the excess pastry, then it went back in the freezer for 15 minutes.

Line your pastry case with baking paper and beans and blind bake for 15 minutes at 200°C/180°C fan/gas 6, then removed the paper and beans and cook for another 5 minutes. (Mine needed an extra 5 minutes.) Take the tart out of the oven and reduce the heat to 150°C/130°C fan/gas 2. My pastry had cracked a little at the edges so I used a little more of the excess pastry to patch it up again.


Lightly whisk the eggs and beat in the sugar. Strain the cream into the mixture and discard the basil leaves. Add the lemon zest and juice and whisk to combine. Pour the mixture into the tart case (set it on the oven shelf halfway through and pour the last of the mixture in while it’s stable in the oven, that way you lessen the risk of spilling it) and bake for 25–30 minutes (again, mine needed an extra 5 minutes), until the edges of the filling are firm but the centre wobbles (it will firm up as it cools).


Ruby tweets @rubytandoh. Crumb is published by Chatto & Windus.

Strawberry Scones


Last week I made butter and was left with a little buttermilk. We were heading down to Camber Sands for a good old British weekend by the sea with a friend and her girls, so I decided to make scones to take with us.

I also had half a punnet of strawberries that were about to turn to mush, so I figured strawberry scones were the way to go. When I make scones I always turn to my trusty Little Book of Scones. I should confess that I edited this book back in the day, but I’ve made several of the recipes and they are just delicious, so it’s still a book I keep handy on my shelf.


I used the basic part of the Raspberry Scones with Vanilla and Lychee recipe and just replaced the raspberries with strawberries. I didn’t go to the trouble of making a cream to go with it, but the one in the book sounds incredible so I’m definitely going to try it one day. To make it you add caster sugar and vanilla extract to whipped cream and then fold in chopped lychees. I would never have thought of putting lychees and raspberry together, but the authors are pretty creative cooks and excellent judges of flavour, so I trust their judgement.

Scones are so quick and simple to make, they’re really no bother at all – particularly handy when you want to bake something quick to satisfy hungry little people. And everyone’s happy when you turn up with a tin full of fresh scones and a packet of home-made butter.


Here’s how I made them.

Strawberry Scones

450g self-raising flour
a pinch of salt
175g butter, cubed
75g golden caster sugar
1 tsp custard powder
90g strawberries
1 heaped tsp baking powder
2 eggs
75ml buttermilk

Preheat the oven to 190°C/gas 5.

Put the flour, salt and butter in a bowl and rub together until you have a fine breadcrumb texture. Add the sugar, custard powder, strawberries and baking powder and stir it all together.


Crack the eggs into a bowl and pour in the buttermilk. Whisk until the mixture is light bubbly and then pour the mixture into the bowl with the flour and strawberries. Fold everything together until just combined and then bring it all together with your hands. You’ll find it starts off feeling dry and then gets really wet as the strawberries release their liquid.


Tip the dough onto a lightly floured work surface and knead very gently until smooth.

Roll out the dough to about an inch thick and use a small cutter or glass to punch out scones. I made mine pretty small – about 2 inches wide. Because the dough is wet it’s harder for larger scones to rise. If you find they’re sticking to the cutter, dip it in flour before you punch out each scone and you’ll find it much easier.


Bake for about 20 minutes and leave to cool on a wire rack. 


Serve with lashings of cream and jam or warm from the oven with a good spread of butter and a hot cup of tea.

The Little Book of Scones by Grace Hall and Liam D'Arcy is published by Square Peg.

Butter and Herb Butter from Scratch

I’ve been meaning to have a go at making butter for a while now. I kept reading about how easy it is, and how fun it is to make it with children. What’s more, you’re in control of how many additives and preservatives go into it, so it’s hopefully a healthier option than shop-bought butter.


What’s brilliant is that butter can be made with just one ingredient – cream – plus salt if you want to add it. And it is fun. And children do love it, although Sidney’s a bit young and kept trying to run off with the jar.


The key to making butter is not to give up. You start off with cream in a jar and shake it up until you have butter. But first you’ll get whipped cream (handy to know if you don’t have a whisk handy – I’m thinking makeshift cream tea beside the sea.)

I was having too much fun to keep time, but I think I was shaking for about 15 minutes. Maybe less. I was imagining toned upper arms but, to be honest, it wasn’t that much of a workout before I heard the sound of butter sloshing around in buttermilk.

I decided to add herbs to my butter. My plants have gone a little crazy since the sun came out and I needed to trim back my sage, in particular. I kept a little back for plain butter and put the individual herb butter packages in the freezer. I’ll probably use them to top fillets of fish.

This is how I made my butter, and herb butter.

Home-made butter

200ml double cream
a pinch of salt (optional)
iced water

Pour the cream into a jar with a tight-fitting lid and shake! First of all you’ll get a lovely whipped cream.


Then, after about 10 minutes, you’ll hear a sloshing sound when the butter separates from the buttermilk.


Pour off the buttermilk and save it for later, squashing the butter with a spoon to squeeze out as much buttermilk as you can. (The buttermilk should last in the fridge for xxx days; I used mine to make scones.)

Tip the butter into a bowl of iced water and continue to squeeze out any remaining buttermilk. Tip the liquid away and replace it with fresh iced water a couple of times to make sure all the buttermilk is gone, as this is what makes the butter go rancid and it will keep for longer without it. Now is the time to add salt, if using.


Now your butter is ready to eat.

Home-made herb butter

4 portions butter
1 chopped tbsp each of common sage, pineapple sage, chives and Greek basil


Simply chop up your clean, dry herbs, separately or as a mixture and then mix the chopped herbs with the butter.


Wrap your butter or herb butter in greaseproof paper and store in the fridge for up to three weeks (if you rinsed it really well), or the freezer for a few months. Salted butter will last longer than unsalted.


Very Easy Fruit Lollies


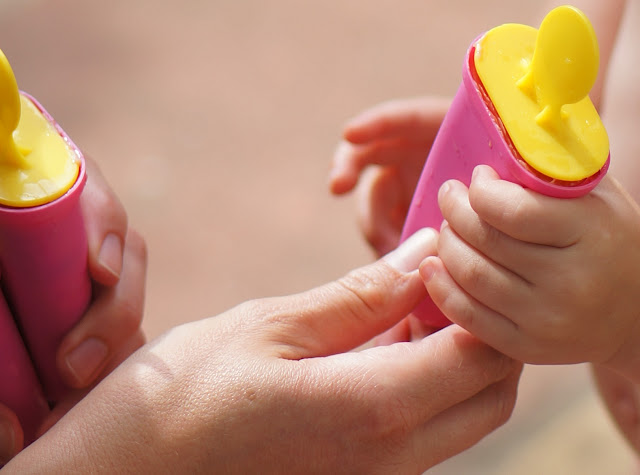
On one of our many pilgrimages to IKEA last year I spotted a very cute ice lolly set that I couldn’t resist. I’d read about how frozen foods can ease the pain from teething and knew that I’d get plenty of use out of them long after Sidney had a full set of gleaming white teeth.

A couple of weeks ago we melted in our annual summer heatwave, with temperatures soaring here in Brixton. At about the same time I discovered my lolly moulds in the drawer at the bottom of our dresser. Time to make something ice cold and delicious.


I had far too much fruit in the fridge after succumbing to the temptation of a multi-punnet bargain at Sunday’s farmers’ market. I had two punnets of ripe red strawberries and one of super sweet, juicy cherries that weren’t going to last the week. It was the ideal way to use them up.

There are lots and lots of recipes for fruit pops on the internet, all proving that it’s really, really easy to make healthy ice lollies. Lots add sugar, some add cream. I kept it really simple and left out added sugar as my fruit was sweet enough already, and I used Greek yoghurt rather than cream, for no other reason than that we always have it in the fridge and I rarely buy cream unless it’s for a specific recipe.

Essentially you can mix and match the ingredients to your taste. Using yoghurt or milk on its own gives an icier result than if you were to add cream, but leave the lollies out for a few minutes to soften up and it’s not a problem. I had six moulds and only filled three of them from this recipe. The other three were already filled with blueberry, banana and raspberry lollies I’d made earlier in the week.


Sidney loved his lolly. It was a little cold and hard to start with, but once it softened up a little he kept coming back for more. And luckily for me we had the paddling pool out so cleaning up the lolly that found it’s way into his hair, behind his ears and all the way down his tummy wasn’t as hard as it might otherwise have been.

Here’s how I made them.

a handful of mixed berries (fresh or frozen)
1 banana, sliced
2 tbsp yoghurt


Put all the ingredients into a bowl and whizz with a hand blender. I kept some of my banana slices whole and some of the berries chunky. It’s particularly nice to use whole blueberries because they pop when you eat them.

Pour the mixture evenly between lolly moulds and freeze for at least 2 hours, preferably overnight.


Leave for 5-10 minutes to thaw a little, then eat them up.